
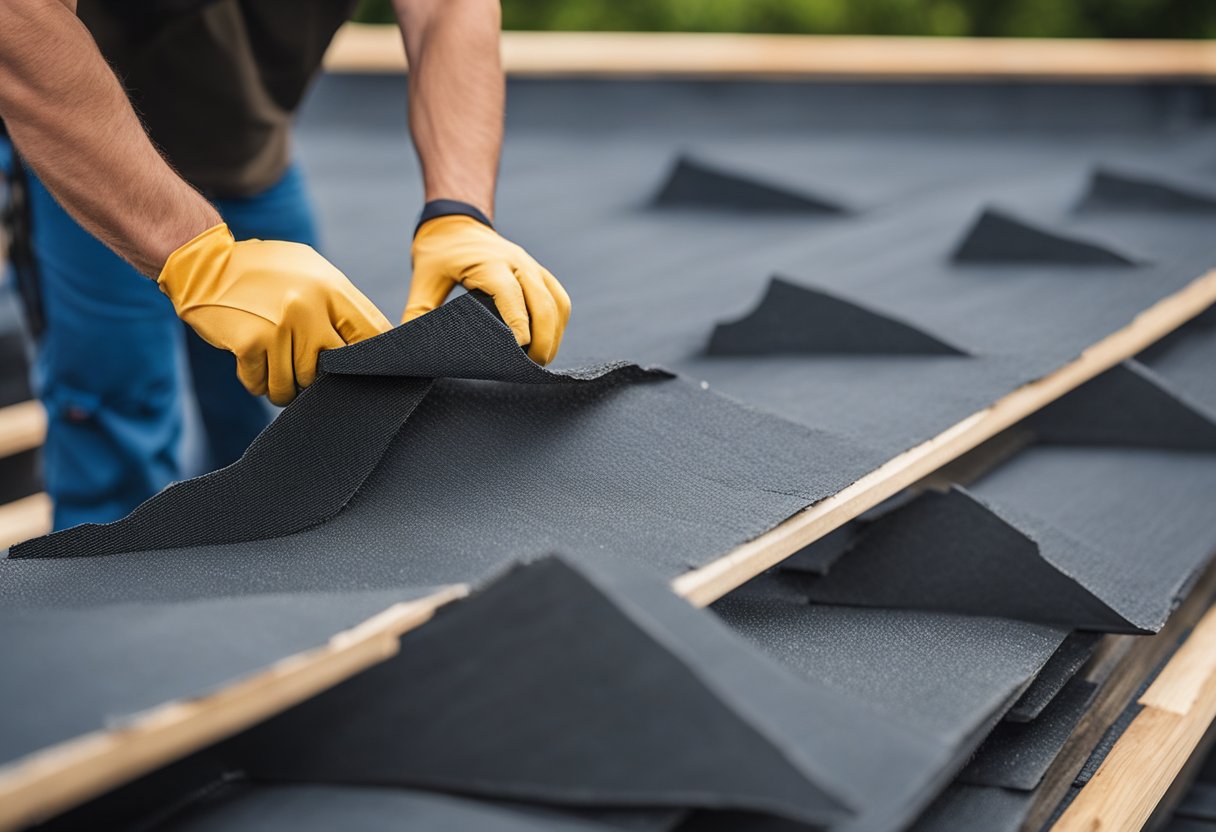
Under slate roof tiles, an essential component is the underlayment, which functions as a protective layer. This underlayment is installed directly onto the roof deck, usually made of plywood or OSB (oriented strand board), and plays a critical role in the roofing system’s integrity. It serves as a water-resistant barrier, safeguarding against potential leaks that can occur if the slate tiles are cracked, broken, or become missing over time. The proper selection and installation of underlayment are crucial for ensuring the roof’s longevity and effectiveness in shielding the building from water damage.
Several types of underlayment are suitable for use with slate roofs, including traditional asphalt-saturated felt and more modern synthetics such as vapor permeable membranes. While asphalt-saturated felt has been a standard choice, offering a degree of waterproofing and cushioning for the slate, newer advancements in underlayment materials provide improved durability, resistance to tearing, and better performance under varying temperature changes. These synthetic underlays often incorporate features like enhanced vapor permeability, which can be beneficial in managing moisture in the roof system.
Slate Roof Fundamentals

When installing a slate roof, proper underlayment is key to ensuring longevity and waterproofing. The underlayment acts as a secondary barrier against moisture ingress, with traditional options being roofing felt or newer synthetic materials. It’s essential to start with a clean and flat roof deck, as any imperfections can affect the slates’ positioning.
The slate roof construction necessitates a robust framework to support the heavy weight of the tiles. The deck must be inspected for wear, rot, or damage and repaired or replaced as needed. One must ensure that the deck is level for optimal slate tile installation.
In terms of installation:
- Roofing Nails: Galvanized, stainless steel, or copper nails are used to secure slates.
- Slate Cutter: A specific tool designed to cut slates without damaging them.
- Chalk Line: For ensuring straight and uniform row alignment.
Flashing plays a significant role in preventing water penetration at joints or roof features like chimneys. When affixing slates, it’s essential never to walk directly on them to avoid breakage.
The headlap—the portion of the slate covered by two courses above—is crucial. Typically a headlap of three inches is recommended, especially in areas prone to ice damming or driving rain.
To summarize the installation guidelines:
- Start with a primary inspection and leveling of the roof deck.
- Install underlayment for additional water protection.
- Ensure straight rows and uniform alignment using a chalk line.
- Use the appropriate nails and tools for securing the slates.
- Apply flashing correctly to mitigate water infiltration points.
- Maintain a proper headlap for ensuring water flow over the slates, not beneath them.
By adhering strictly to these fundamentals, a slate roof can provide not only an elegant aesthetic but also a durable, weather-resistant structure.
Underlayment and Installation
Incorporating the appropriate underlayment and employing the correct installation techniques are fundamental steps to ensure the longevity and performance of slate roof tiles. Proper selection of materials and adherence to best practices are indispensable during the installation process, including the critical starter course setup.
Choosing the Right Underlayment
The best underlayment for a slate roof tile is often determined by local building codes and the specific requirements of the roofing project. A common choice is a high-quality, breathable synthetic underlayment that offers robust moisture protection. In colder climates, an ice and water shield may be recommended at the eaves, valleys, and around penetrations. For enhanced durability, two layers of ASTM 30-pound asphalt-impregnated felt, which can last for 20 to 30 years, are typically advised. It’s also beneficial to check for an UL classification that suits the slate and tile roofs, ensuring the underlayment meets performance standards for fire resistance and material quality.
Slate Roof Tiles Installation Techniques
Correct installation begins with preparing a clean, flat, and stable roof deck. Any damaged decking materials should be replaced, and the surface must be level—checked with a spirit level—before laying the underlayment. The underlayment should be applied with adequate overlaps, usually recommended to be about 4 inches, and secured to prevent water ingress. The number of underlayment layers may vary based on regional weather conditions and slate thickness. In some cases, slating a roof with fibre cement may require tailored techniques to accommodate the specific characteristics of the material, such as weight and flexibility.
Slate Roof Starter Course
The installation of the slate roof begins with the starter course. This initial layer is crucial as it influences the subsequent courses’ alignment and overall roof appearance. The starter course slates are typically installed with their back face showing and should overhang the roof edge by around 1 inch to ensure proper water runoff. It’s also vital to ensure the starter course is in perfect alignment since it sets the baseline for the entire installation. Fasteners should be of non-ferrous metal, like copper or stainless steel, to avoid corrosion and premature failure.
Finishing and Pricing

When it comes to slate roofs, the finishing touches and cost are as important as the initial installation. Precision in edging defines the roof’s aesthetic appeal, while pricing is a major consideration due to the range of slate quality and associated labor costs.
Finishing the Edges
The edges of a slate roof require proper finishing to ensure a seamless appearance and structural integrity. The most common method involves trimming the slate tiles to create a clean edge that aligns with the roofline. Copper or stainless steel flashing is often used to neatly seal the perimeter, directing water away from the roof and preventing leaks.
Cost Considerations
The price of installing slate roof tiles varies significantly based on the material quality and installation complexity. Natural slate tiles can range from $800 to $1,500 per square (100 square feet). The total cost factor in the slate itself:
- Materials: $500.00 – $2,000.00 per square
- Labor: Installation complexity, roof condition, slope, and size
It’s important to note that these figures can fluctuate due to regional labor costs and the specific grade of the slate chosen. Lower-quality S2-grade 1/4-inch-thick soft slate may start at $17.80 per square foot, while high-quality options can reach $38.48 per square foot.
Alternative to Natural Slate
When property owners consider roofing materials, they often look for options that balance durability, aesthetics, and cost. Artificial slate roof tiles, also known as synthetic slate, have emerged as a competitive alternative to natural slate.
Composition: Artificial slate tiles are typically made from engineered polymers combined with recycled plastic and rubber. These materials mimic the texture and color of natural slate while being lightweight.
Benefits:
- Weight: They are significantly lighter than natural slate, reducing the need for additional structural support.
- Ease of Installation: Synthetic slate is easier to cut and install, which can lead to a reduction in labor costs.
- Durability: They are impervious to rot and resistant to impact damage, which can be a concern in areas with hail or frequent storms.
- Maintenance: They require minimal maintenance compared to natural slate.
Cost Comparison: The cost of artificial slate is usually lower than that of natural slate. This is a substantial consideration since slate is one of the more premium roofing materials on the market.
- Artificial Slate: Ranges from a more affordable price point to moderate, depending on the quality and brand.
- Natural Slate: This can be considerably more expensive, both for materials and installation, due to its weight and the necessity for specialized labor.
Artificial slate offers a compelling proposition for those seeking the timeless appearance of slate without the associated weight and cost. It stands as a suitable option for a variety of roofing projects where traditional slate might not be practical or within the budget.
Freddy & Son – Best Slate Roof Installers in Manassas, VA
Freddy & Son are known as the best slate roof installers in Manassas, Arlington, and Reston. They specialize in installing high-quality slate roofs that make homes look beautiful and last a long time. With over 10 years of experience, their expert team follows strict guidelines to ensure every roof they install meets the highest standards. They take pride in their work and make sure each roof looks amazing and follows all the rules. If you want a slate roof that’s strong, durable and looks great, Freddy & Son Roofing Contractors in Virginia are the ones to call.

